

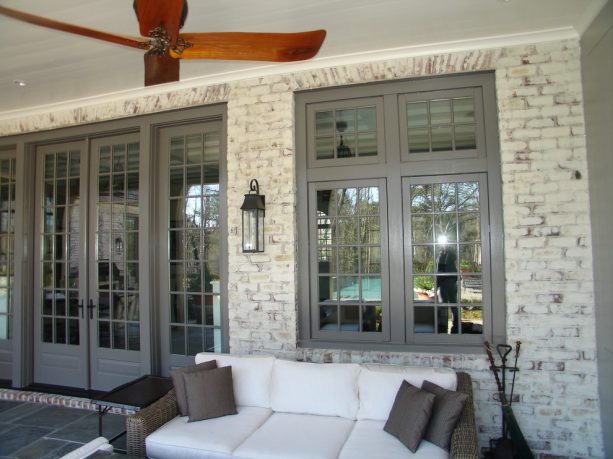
Limewash brick is a brick that is given color by using limewash paint.

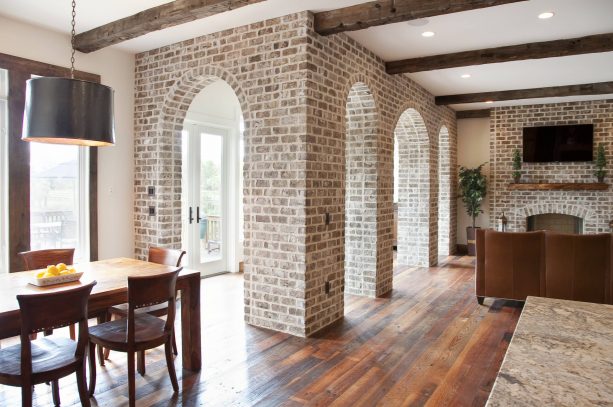
In the world of home interior and exterior design, limewashing brick can be said to be another way to add color to natural brick walls, including also fireplaces, hedges, ovens, and other brick home elements.
Limewashing like this belongs to the category of remodeling. If by any chance you are interested in remodeling your brick walls by adding a new color to it, surely limewashing is an option to consider.
Here you can find 11 most basic but also crucial facts that will let you know everything about limewash brick and, of course, the brick-limewashing process.
The points include: what limewash is, differences between limewash and whitewash, specific limewash paint to use on brick, recipe to create your limewash paint, and steps you have to do in limewashing brick.
Besides, there is also maintenance you need to perform on lime-washed brick, the length of time lime-washed brick can last, steps to do to remove limewash paint from a brick surface, the ways to lime wash red brick, how to lime wash exterior, and the steps to lime wash brick fireplace.
What Is Limewash?
The first fact we will discuss here is what limewash is.
If seen from its name some people may think that it has something to do with lime fruit. Do you think the same?
Limewash does not have any lime fruit in it because it is a type of paint known since a very long time ago. The name is limewash because the primary ingredient is limestone.
Other than as paint, limewash can also mean a verb or activity of giving brick or another surface by using limewash paint.
To produce limewash paint, you need to turn limestone into lime putty. The way is by crushing, burning, and finally slaking the limestone with water, so it changes into lime putty.
The process does not end right there. After you create the putty, you can’t directly use it as limewash paint. It still needs some maturing that possibly takes several days to months. When the putty is mature enough it will be thinned by using water, so limewash comes out as the final result.
About the characteristics of limewash, the most significant feature we can see from it is none other but the color. Because of the primary ingredient, limewash commonly has a white color.
Although so right now pigmented limewash is also available, so it is possible to choose any other colors than white.
Another significant characteristic is the, slightly chalky and matt appearance. This appearance is the result of the formation of the crystalline matrix after the paint is applied on a surface.
Limewash Paint for Brick
The next most essential fact for you to know is about limewash paint for a brick surface.
This point is inseparable from a question that a lot of people have in mind; is there any particular limewash paint to use on brick?
Well, there is factually only one type of limewash paint available, and it works most excellently on porous surfaces where it can sink into mainly because this paint is water-based.
Those include brick, lime plaster (traditional), lime render, and stone.
On the contrary, it cannot work well on less-porous surfaces. Those include hard gypsum plaster and cement renders. To make limewash bonded on these surfaces better particular additive must be added into the paint.
Since brick is a material with the best porous surface, it will never be hard for the paint to sink into it.
The reaction between the paint and carbon dioxide in the air, which also hardens the paint, is the one that creates the deep matt appearance is one of the best characteristics of limewash.
Although there is no specific limewash paint for brick, since brick is one of the best surfaces to apply this type of paint on, there is no need to doubt the result.
Moreover, the paint will look more attractive on the brick when there is dampness unintentionally appear on some parts of the brick surface.
Limewash vs Whitewash
When it comes to changing the color of a brick surface, people may get confused in differentiating between limewash and whitewash.
Moreover, some people even think that both refer to the same type of paint. The fact is they both are different, and you can understand this better through the following explanation.
As told earlier, limewash is a limestone-based paint for limewashing. On the contrary, whitewash is any water-based white paint for whitewashing.
Other difference is the color result from the washing project.
Since limewash is now available in different colors, the result is more various too. On the other hand, whitewashing can only result in white color since the paint used is just white paint.
While the main differences of limewash and whitewash are on the paint types and the result, both are similar in the way the paints are water-based and work the best on porous surfaces like brick.
If being asked about which one is better, in this case, we can focus more on how limewash has better qualities that also make it a better choice to take into consideration.
Here we will also point more to the excellence of limewash when used on the brick surface.
The first excellent quality of limewash is none other but its breathability.
Applying the paint on a brick surface does not only give a fresh aged-like color. The breathable paint does not trap moisture inside the brick. Instead, it allows moisture to evaporate outside the brick.
When there is moisture in the brick condensation, dampness, and rot are the results. All these can create damage to the brick sooner or later.
With limewash’ breathability, you can avoid all the problems. For you to know, this is also the reason why limewash is often chosen to (re)decorate the brick walls of old and even historical buildings.
Another excellent quality that makes limewash a better choice is that it is also well-known as a natural fungicide. Besides, limewash also naturally contains alkaline that can
Lime Wash Recipe
It is true that when you want to limewash brick wall or other brick surfaces, you can directly buy premix limewash paint at a store and use it based on the instructions available.
However, if you want to make the process more exciting and you want to gain better knowledge about limewashing, you can make your limewash paint at home by following the recipe that will be shared to you here.
To make the paint, you need to prepare the ingredients. They include:
1. Hydrated Lime Type S or Lime Putty
Although earlier it is mentioned that limewash paint has lime putty as the base ingredient, hydrated lime type S is another alternative ingredient to create it.
This component is more effortless to use to make limewash paint. Therefore, this is more recommended to choose.
You can find this ingredient easily at a hardware store. You can try to look for it on the cement section of the store.
2. Water
3. Organic Pigment or Powdered Pigment
There are reasons why two types of coloring you can choose here.
The organic pigment is the right choice for you who are always fond of natural alternatives. Besides, this type of coloring also keeps the natural value of the paint better.
If you need some examples of organic pigment, you can use beet juice for reddish color, cinnamon for brownie color, and turmeric for yellowish or orange tint.
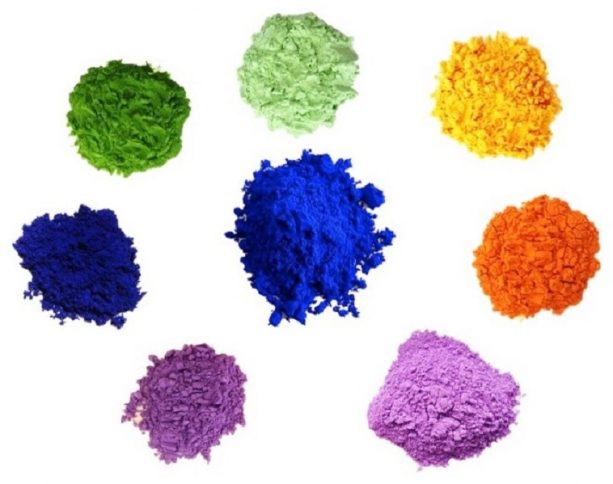
On the other hand, powdered pigment is also not a wrong choice. The main reason is that it offers you more color options.
Other than the ingredients, you also need to prepare some tools. Those are:
1. Plastic Bucket
If you need a lot of limewash paint, it is better to make the paint in one bucket to avoid color difference and adhesive level. Therefore you are recommended to use a big plastic bucket instead of the small one.
Besides, bigger plastic bucket usually also leaves some space. This space is useful for avoiding splashes when you use the paint later.
2. Any Utensil to Stir the Ingredients
Here you can use a plastic spoon or any other tools you can use to mix all the ingredients needed to make the wash.
3. Safety Gears for You to Wear
It is true that limewash paint is environmentally friendly. However, it does not mean that the paint is not caustic to human. It is a very caustic one.
When the paint is in a wet state, this can cause burns. To avoid this, you can prepare dust mask, long sleeves, rubber gloves, and safety goggles to wear when making and using the paint.
When all ingredients and tools are available, the next thing to do is following the steps to create limewash paint as stated in the following.
- Pour enough amount of water into the plastic bucket or another plastic container you have prepared previously.
- Gradually and very slowly, add the hydrated lime type S powder to the water and stir it thoroughly by using the plastic spoon or any other utensil whenever you add the powder to the water. Adding the powder into the water is more recommended here than adding the water to the powder because this can avoid you from accidentally inhaling the dust, which is dangerous.
- Keep doing the second step until the paint has the consistency of milk, which means that the paint is ready to use.
- Lastly, you just need to add color to the paint if you want the painted brick has a different color than white only.
If you read the list of ingredients above, maybe you realize that there is no specific amount of hydrated lime type S powder and water suggested for you to prepare.
In the steps of making limewash paint, there is also not a ratio of water and powder given. There is a reason behind all these.
About the amount of each ingredient needed to make the paint, it depends on how much paint you need. The more paint required means, the more water and powder needed too.
As for the ratio, it is not the most important thing to pay more attention to since it is better for you to pay attention to the paint consistency here.
The consistency is said so because milk consistency means the paint can adhere appropriately on the brick surface. Besides, it also means that the paint is not too thick so it won’t give plaster look in the final result.
Now about the coloring, if you prefer choosing powdered pigment instead of natural pigment, there are things to give more attention to.
You need to know that you need to mix this type of pigment with hot water and not cold water before adding it to the paint. This action must be done to avoid clumps to appear.
The average ratio is 20:1. However, if you want the color to be thicker, you can add more powdered pigment until you get the shade you want the most.
If by any chance you face difficulties in creating this paint recipe, such as when you are afraid that you can get the right consistency in one try, there is a tip you can follow. It is to make the paint in a smaller amount first and remember the amount of hydrated lime, water, and coloring you use.
Once you get the right milk consistency and color, you just need to double or triple your recipe to get the right amount paint. This way is quite useful in avoiding a mistake in creating limewash paint by using this method.
How to Limewash Brick
Now that you already know about the recipe to prepare for limewashing, it is the time for you to know about how to use limewash paint on your brick wall. You have to be grateful here because it is effortless to do.
Here, you also need to prepare some tools. Those include water mister or spray bottle, rough-textured brush in large size or drywall sponge, rubber gloves.
The most important thing you need to know first when applying limewash paint on the brick surface is that the surface MUST be damp. Indeed, it means that the surface is dry you need to make it damp first.
The best way to do this is by using water mister since this can make the process faster but if there isn’t any, you can use something else like spray bottle as long as a result is a damp surface.
After damping the surface, the next thing to do is applying the paint by using the rough-textured brush or drywall sponge.
In this step, it is essential to keep your rubber gloves on remembering the caustic characteristic of the paint to human.
When you finish applying a coat of paint on the brick surface, it is impossible to get the look you want since a single layer of paint still makes the original look of the brick lightly visible.
You need at least three or four coats to get the right look.
A mistake that many people do in limewashing brick is that they directly apply another coat right after they finish making a single layer. You MUST NOT do something like this since it will only run everything.
Before applying another coat, you need to make sure that the previous one is perfectly dry. Once it is dry, you also need to make it damp again by spraying water on it before the paint is applied to it again.
Remember, you must use limewash paint only on a damp surface.
When you are done making three or four coats, the last thing to do is letting the surface dry for at least three days. In the meantime, you should not touch the surface or hang anything on it.
Another thing you shouldn’t do is trying to hasten the drying process such as by using a fan or even heater. If you want a perfect final result, you need to let the paint dry naturally and slowly.
At the same time, if needed you need to keep the temperature in the area not to be too humid or too hot.
Lime Wash Red Brick
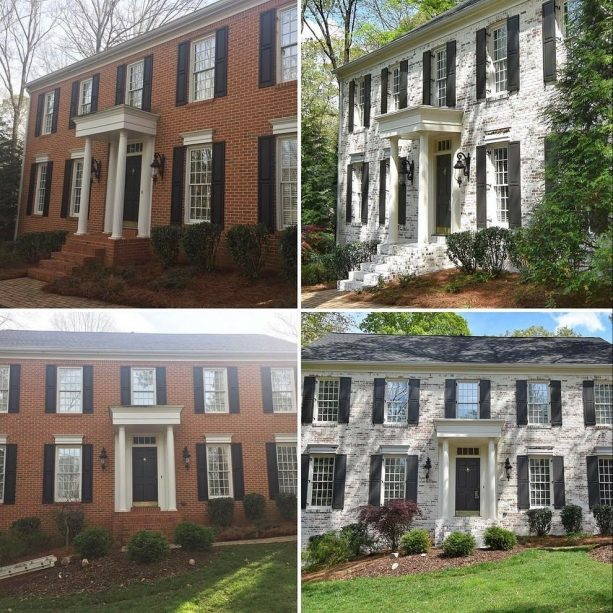
In whitewashing, red brick can be a significant problem. The reason is that when you whitewash red brick, the result might not look white but pink instead.
The mixture of the red color of the brick and the white color of paint for whitewashing is the main reason why pink is the final result.
The question then is; will pink color come as a result as well when the brick is lime-washed?
Here, you need to remember that although white is the primary color of limewash; there is also pigmented limewash that offers you the greater color option.
This option will inevitably reduce the possibility for the red brick color to be visible after the coating.
However, it is undeniable that the natural color of red brick is rather intense so more than just a coat of limewash might be needed to cover it significantly.
Limewash Brick Exterior
Limewashing brick exterior is something that has been popular for quite long, and it was even more popular during the 18th and 19th centuries.
Inevitably this popularity came with reasons, and these are also the reasons why limewashing brick exterior is still a good recommendation at this time.
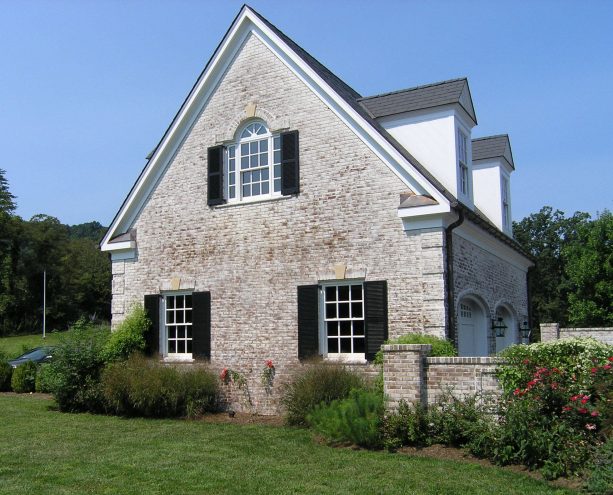
Covering brick exterior with limewash paint is not merely about changing its look. It is also about protection.
Because of the protective value, limewash is often used to cover the brick exterior of old buildings too, so damages are avoidable.
If you want to paint your brick exterior with limewash, you need to find the right time where the temperature is not too high or too low for a perfect final result.
Besides, since the exterior area is commonly larger, it would be best for the project to be done by more people to speed it up.
Lime Wash Brick Fireplace

Limewashing brick fireplace is the same. The difference is the preparation for painting the fireplace by using limewash.
Of course, you need to rest the fireplace before the painting for the sake of average temperature. It means it is better not to use the fireplace before the painting project.
Other than that, you must also clean the fireplace brick because clearly, it is dirty, full soot, and maybe even grease. Besides, cleaning is the only way to perfect the final result of the painting.
In cleaning the fireplace, you can choose a commercial cleaner that is sold at many stores since this may be the simplest thing to do. Although so, you can select other cleaners that you can make at home.
Some of them are even environmentally friendly, so you can gain more peace of mind in using them for cleaning. One of the examples is natural cleaner made of vinegar and water.
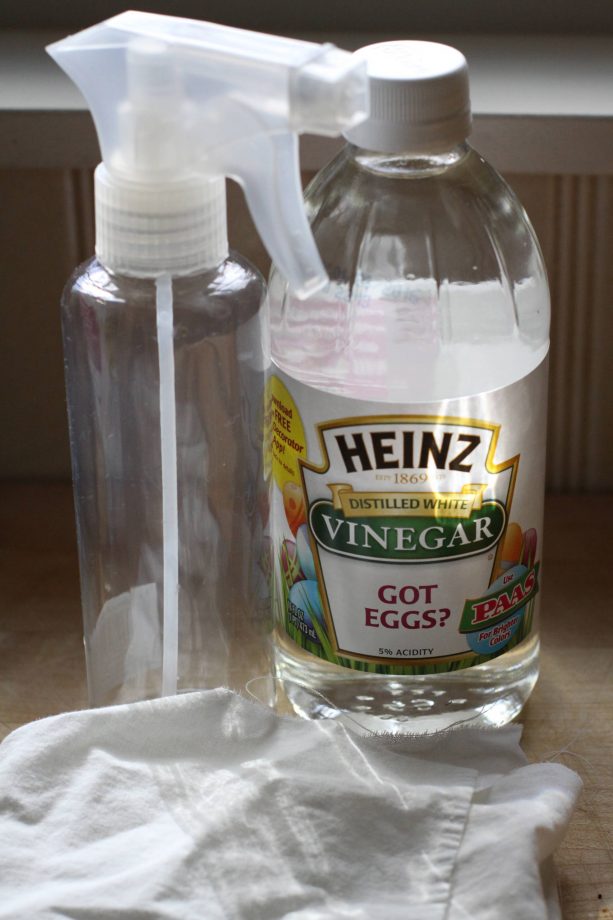
The way to make this cleaner is simple since you only to mix vinegar and water in a spray bottle. The ratio is 1:1.
The way to clean the fireplace by using this cleanser is easy. All of the steps will be explained briefly in the following.
But remember, before you start cleaning it is better to put on a face mask, gloves, and protective goggles, and if any you can provide board or folded a towel for kneeling down.
- Remove the ashes from the hearth. You can do this step by using dustpan or shovel.
- Sweep out debris and soot that remain in the fireplace by using a broom. When done don’t forget to clean up the broom.
- Sweep out again but this time by using a vacuum with brush attachment. When done, please remember to clean up the brush attachment since there is apparently some soot attached to it.
- Spray the bricks with the vinegar and water solution and let the solution set in the brick for a few minutes. When done, respray the brick with the cleaner.
- When the brick surface is still wet, you need to scrub it by using scrub brush in circular moves. You better do this action from the bottom of the fireplace up.
- After done scrubbing, you need to neutralize the acidic effect of the vinegar from the brick surface since it may be abrasive. The way is by washing the brick surface with a solution made of water and baking soda.
Limewash Brick Maintenance
Another great thing about limewash brick is the very low-maintenance. It is incredible to know that you do not need to perform any upkeep at all when you choose limewash brick.
The only upkeep you need is a new coat when the color seems to look faded. A new coat like this is commonly needed every five years so after you apply limewash on a brick wall you can get a peace of mind for at least five years.
This fact means you do not need to prepare extra money for the wall redecorating in the meantime. This truth also implies that limewashing is insurance for interior and exterior remodeling that is budget-friendly.
How Long Does Lime Wash Last?
As told previously, when you are done coating a brick wall by using limewash paint, it will last for approximately five years.
After five years, the color will not be gone, but it will fade. Therefore a new coat might be needed to make it looks new again.
Removing Lime Wash from Brick
Removing lime wash from the brick surface can be said to be a somewhat tricky matter.
If the lime wash is not old enough removing it by washing the brick with water, a little scrubbing by bristle brush, and lastly cleaning the surface with high-pressure water might be useful.
However, you need to make more effort if the lime wash is rather old.
If you want the best removal result, contacting a professional limewash removal company a good recommendation since they surely have the specialized solutions and tools needed in the removing process.
So, those are the 11 most basic yet crucial facts you need to know about brick limewashing.
Now that you have already known about all those and if by any chance you are also interested in limewashing the brick wall in your house, surely you can do everything better and easier.